In the digital age, FaceTime has emerged as a lifeline for connecting with loved ones, friends, and colleagues. Whether it’s a heartfelt conversation with family or a crucial business meeting, capturing these moments can be important for various reasons. However, many iPhone users often wonder how to screen record FaceTime with sound on iPhone effectively. The process may seem daunting, but with the right guidance and steps, you can easily record your FaceTime calls with both video and audio.
Understanding how to screen record FaceTime with sound on iPhone not only allows you to revisit cherished conversations but also aids in keeping a record of important discussions. This feature is particularly useful for educators who wish to document lectures or share informative sessions. Furthermore, it can serve as a handy tool for creating tutorials or sharing memorable moments with friends who couldn't attend the call.
In this article, we will walk you through the entire process, ensuring you can not only record your FaceTime calls but also capture the accompanying audio. So, whether you're looking to save a special moment or need a reliable way to keep a record of important discussions, you’re in the right place. Let’s dive into the world of recording FaceTime calls seamlessly and effectively!
- What Are the Requirements for Screen Recording FaceTime on iPhone?
- How to Enable Screen Recording on Your iPhone?
- How to Screen Record FaceTime with Sound on iPhone?
- Can You Edit Your Screen Recordings Afterward?
- What Should You Keep in Mind When Recording FaceTime Calls?
- Are There Any Limitations to Screen Recording FaceTime on iPhone?
- Conclusion: How to Screen Record FaceTime with Sound on iPhone
What Are the Requirements for Screen Recording FaceTime on iPhone?
Before you can successfully learn how to screen record FaceTime with sound on iPhone, it’s essential to ensure you have the necessary prerequisites in place. Here are the key requirements:
- An iPhone running iOS 11 or later.
- FaceTime app installed on your device.
- Access to the Control Center.
- Enough storage space on your device to save the recording.
How to Enable Screen Recording on Your iPhone?
To start recording FaceTime calls, you first need to enable the screen recording feature on your iPhone. Here’s how:
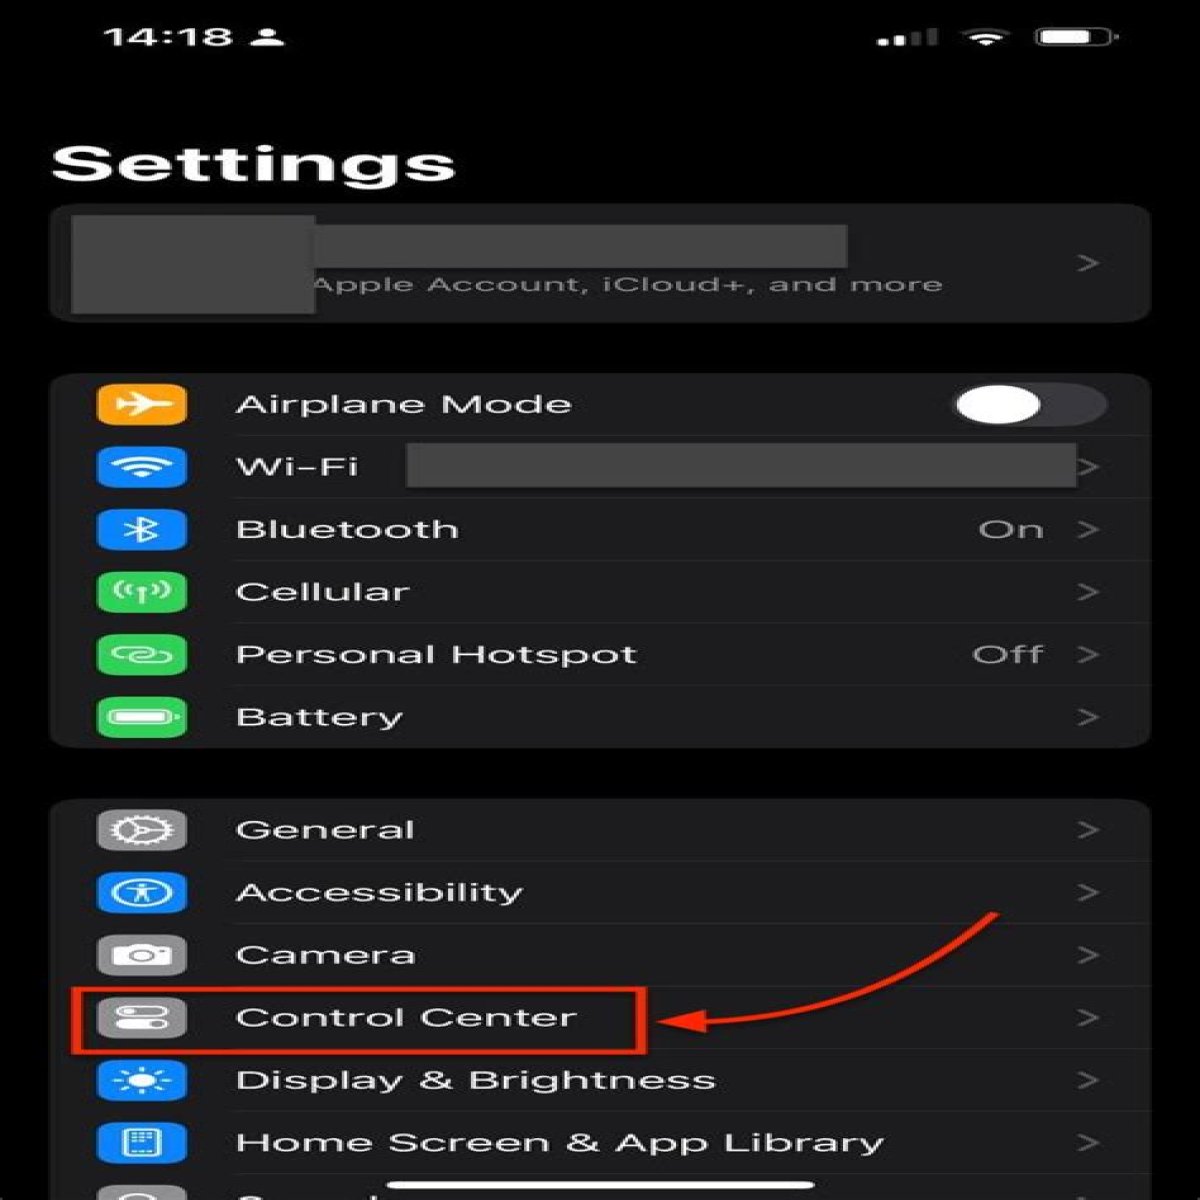
- Open the Settings app on your iPhone.
- Scroll down and select Control Center.
- Tap on Customize Controls.
- Find Screen Recording in the list and tap the green plus button to add it to your Control Center.
How to Screen Record FaceTime with Sound on iPhone?
Now that you have enabled screen recording, let's go through the steps to record your FaceTime calls:
- Start a FaceTime call with your contact.
- Swipe down from the top right corner of the screen (or swipe up from the bottom on older models) to access the Control Center.
- Press and hold the Screen Recording button (the circle inside a circle icon).
- Tap on the Microphone icon to turn on audio recording.
- Select Start Recording, then return to your FaceTime call.
- Once finished, tap the red bar at the top of your screen and select Stop.
Can You Edit Your Screen Recordings Afterward?
Yes, once you have recorded your FaceTime call, you might want to edit the video to remove any unnecessary parts or enhance its quality. Here’s how you can do that:
- Open the Photos app and find your screen recording.
- Tap on Edit in the upper right corner.
- Use the sliders to trim the video, and make any adjustments as needed.
- Tap Done to save your edits.
What Should You Keep in Mind When Recording FaceTime Calls?
While screen recording FaceTime calls is a handy tool, there are several ethical and legal considerations to keep in mind:
- Always inform the other party that you are recording the call.
- Check local laws regarding recording conversations, as laws vary by region.
- Be mindful of privacy concerns and avoid sharing the recording without consent.
Are There Any Limitations to Screen Recording FaceTime on iPhone?
While the built-in screen recording feature is convenient, it does have some limitations:
- The recording can only capture the audio from the microphone and not the internal audio from the FaceTime app.
- Your device must have sufficient storage space to save the recording.
- Screen recordings may not capture video during certain app usage due to restrictions.
Conclusion: How to Screen Record FaceTime with Sound on iPhone
Recording your FaceTime calls on iPhone can be a valuable tool for preserving memories and ensuring vital discussions are documented. By following the steps outlined above, you can easily learn how to screen record FaceTime with sound on iPhone. Remember to consider the ethical implications of recording calls and ensure you have the consent of all parties involved. With these guidelines in mind, you’re now ready to capture your FaceTime moments effortlessly!
Unraveling The Truth: Did Taylor Swift's Parents Divorce?Unveiling The Secrets: Is FaceTime Capturing Your Screen?Jill Goodacre: The Timeless Beauty And Her Inspiring Journey
